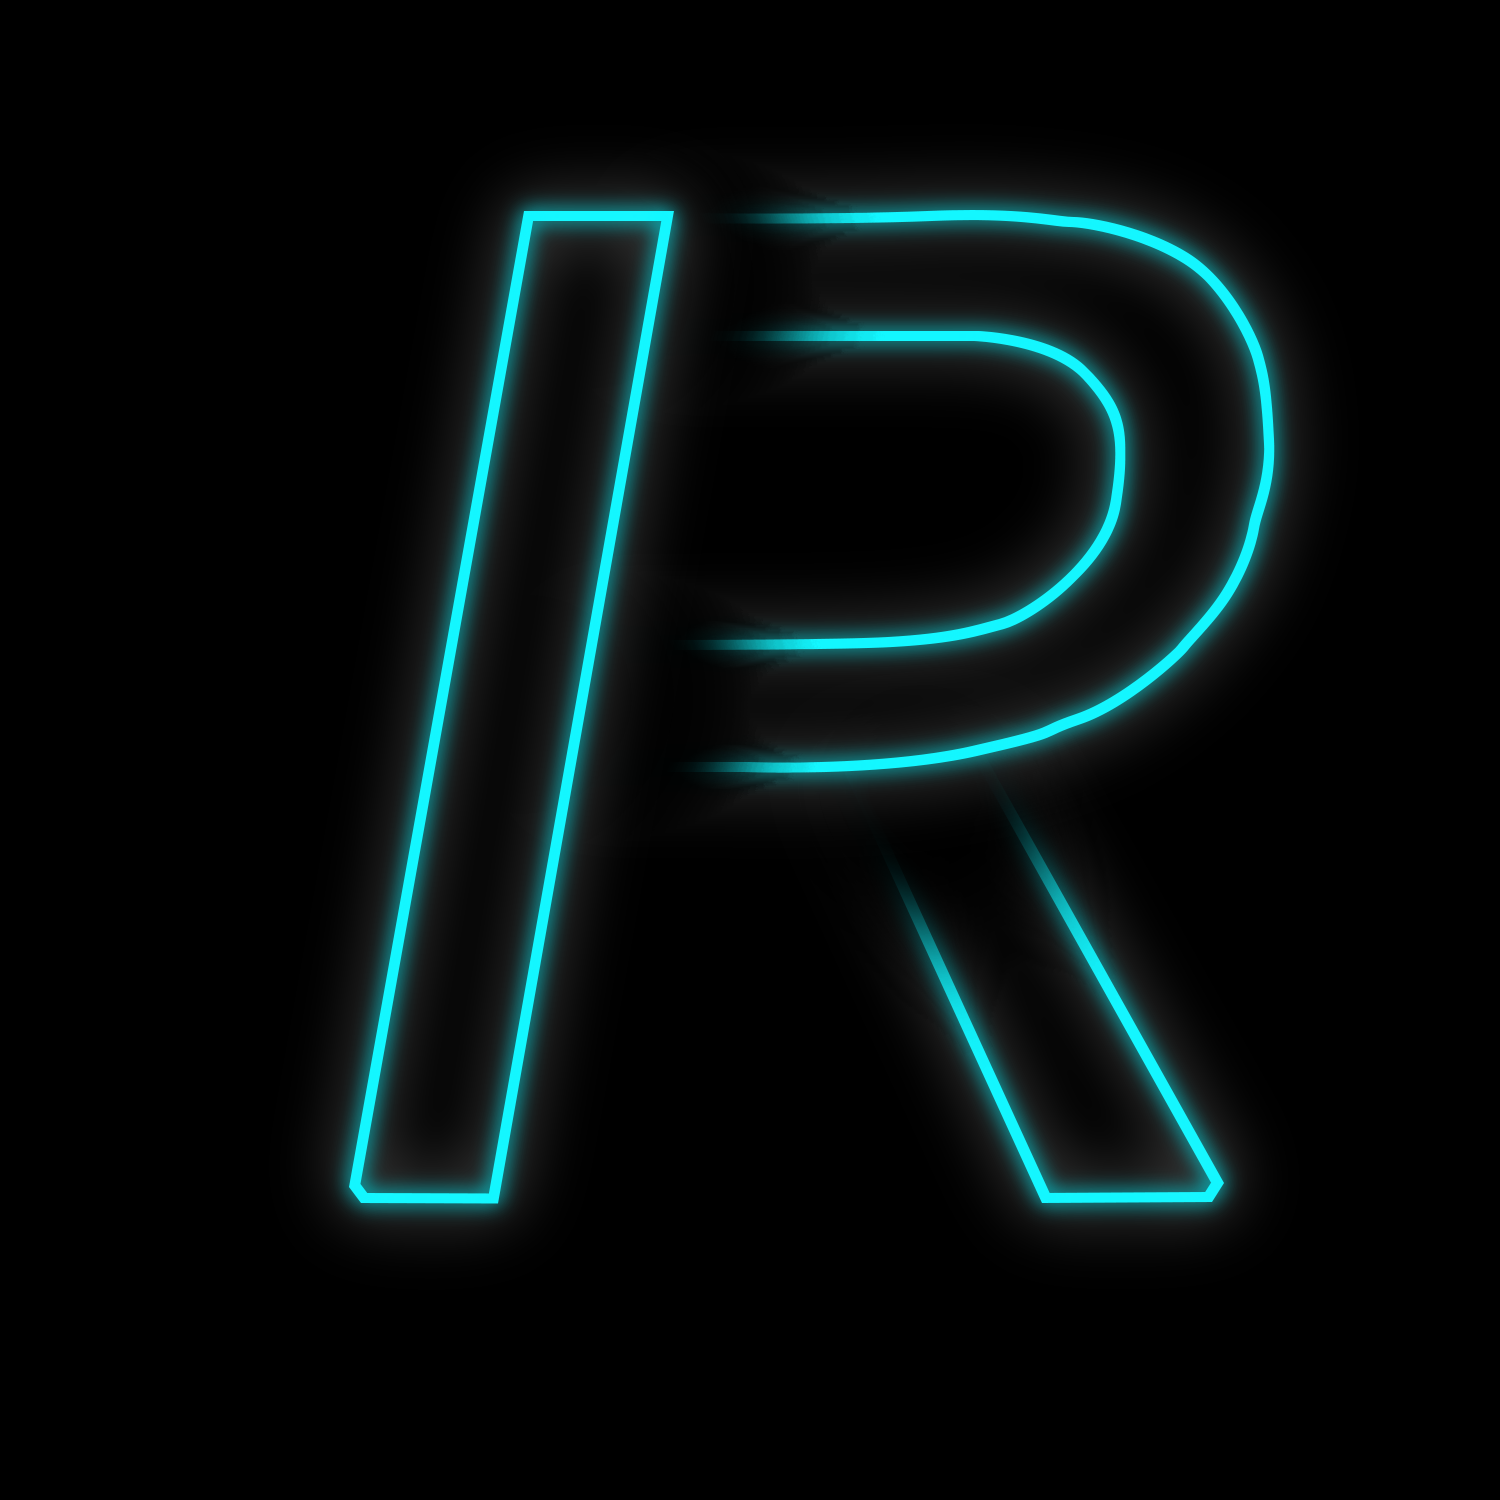
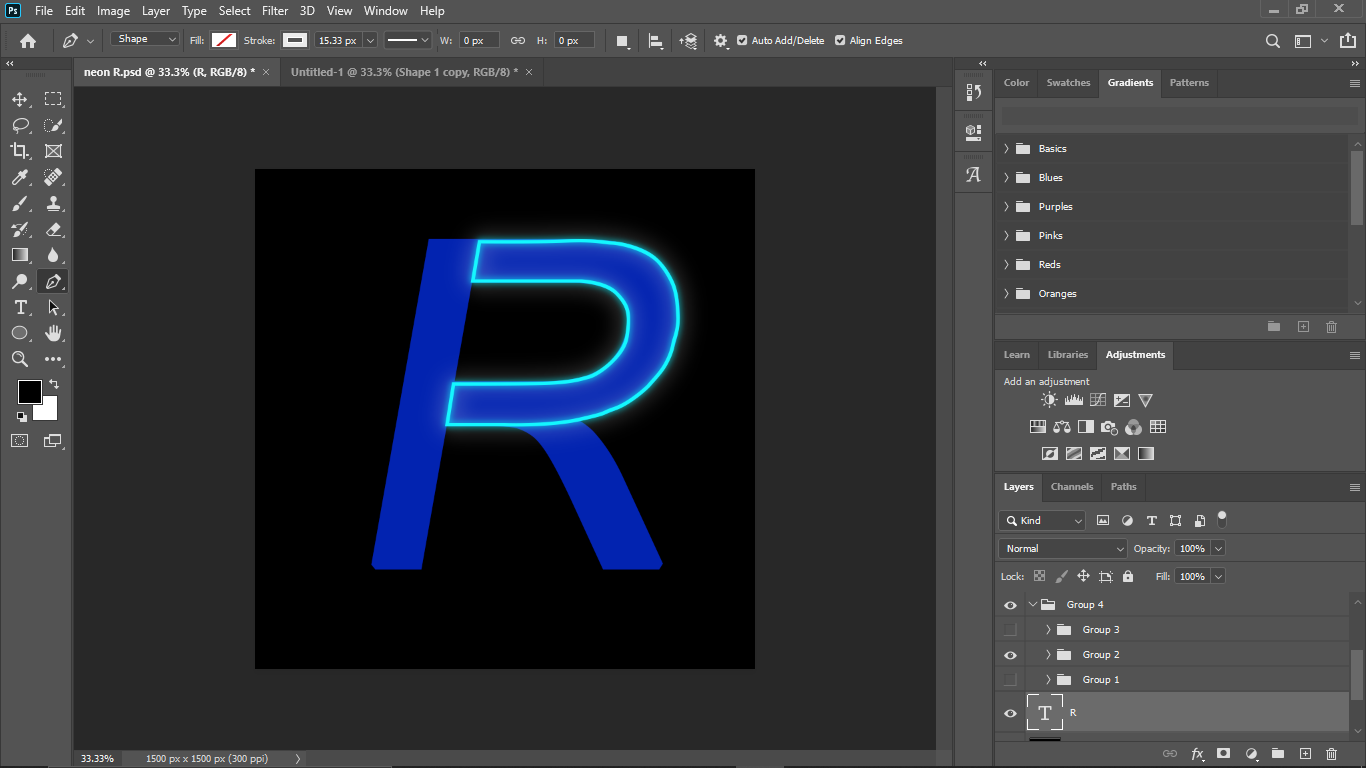
Hey guys in this I will teach you how to create neon alphabets. Like one below

so here are the step to create logo :-
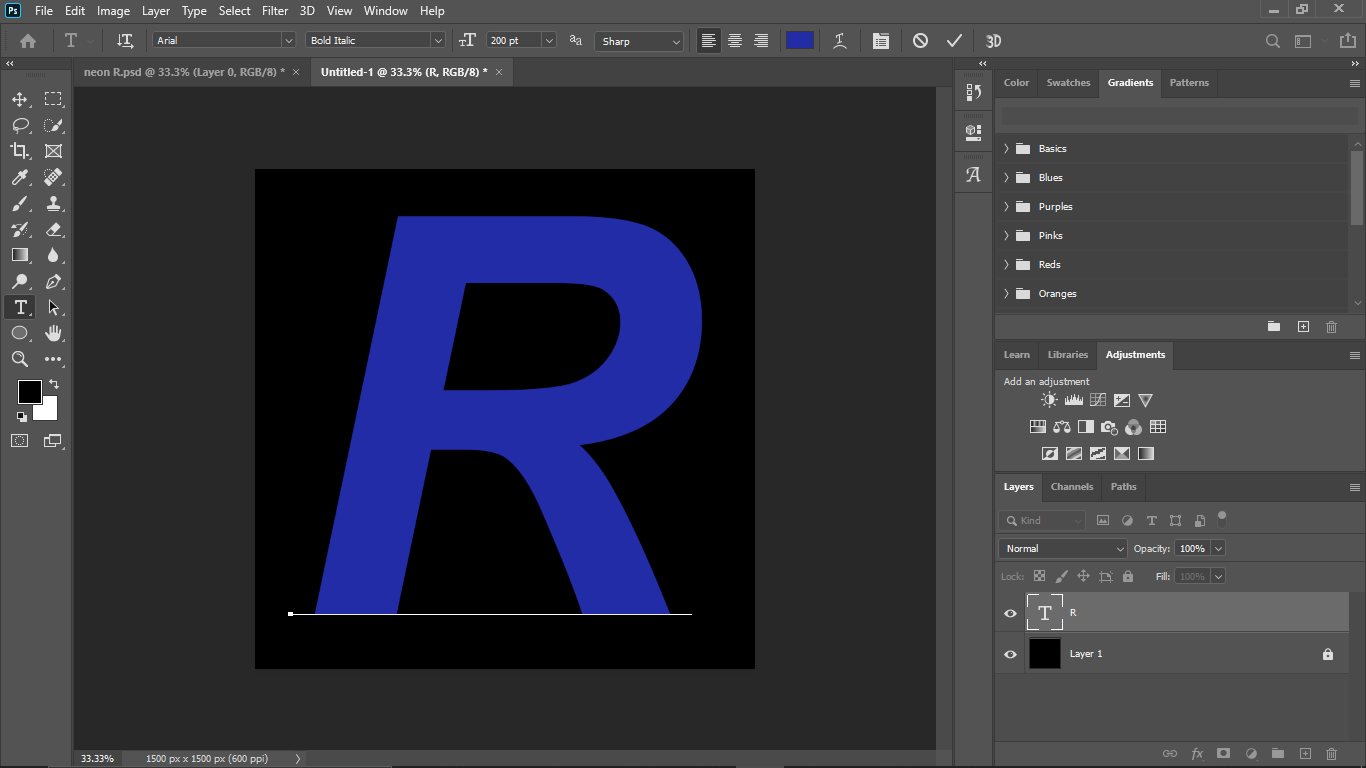
Step 1:- Create new document of 1500x1500 with 600 ppi
Step 2 :- Create a new layer
Step 3 :- Use type tool to write whichever word you want to type, I had used arial in bold italic in 200pt

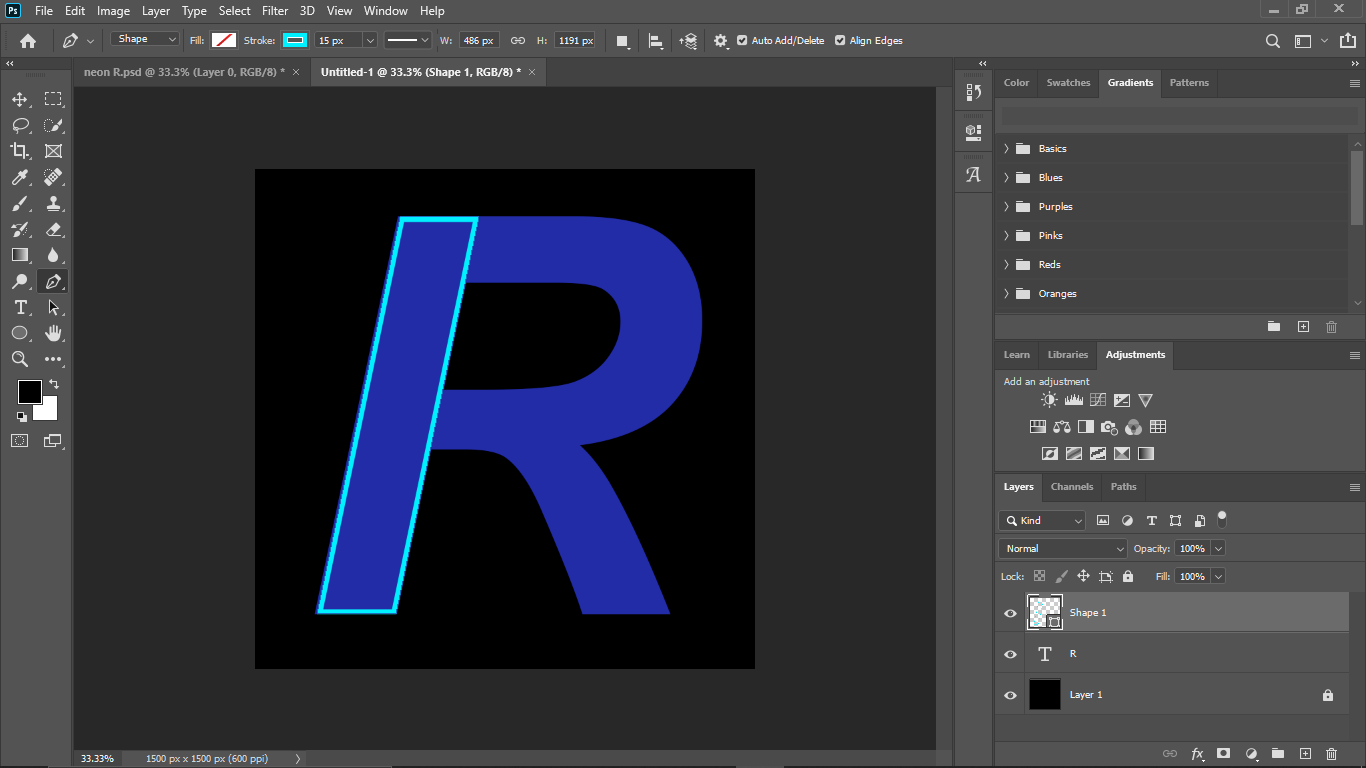
Step 4:- Create a new layer then use pen tool to outline parts of it and stroke the outline in any color which you like ( I had use #00f0ff color )

Step 5:- Now create two duplicate layer of it. Double click on one of the duplicate layer style panel will open now click on color overlay set the color white with opacity 100% and click ok

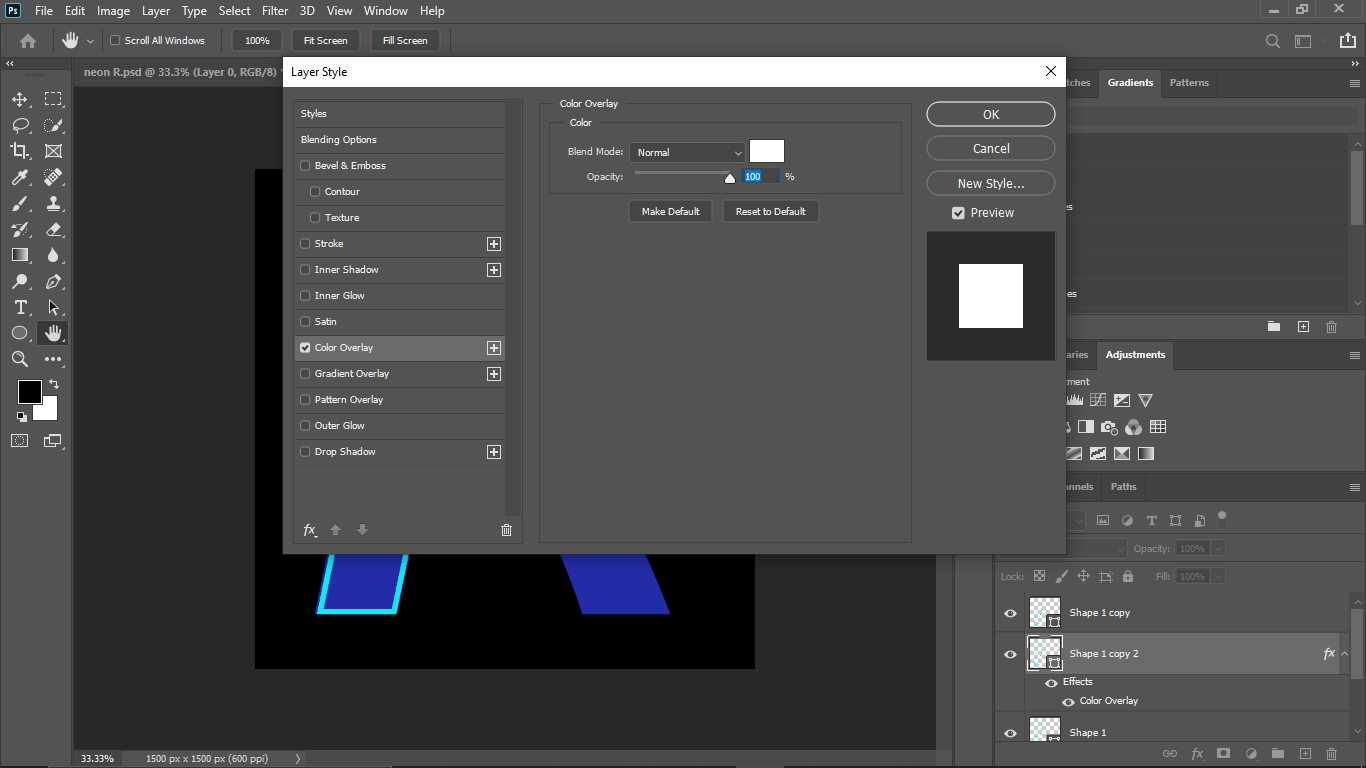
Now right click on that same layer and click on rasterize layer style.
Step 6:- While on the same layer click on filter,blur,gaussian blur. Then select the radius 33 pixel.
Step 7:- Now click on another copied layer then select gaussian blur in the same way as in the last step and select the radius 10 pixel.
Step 8:- Now select all three layer then right click and select merge layer.
Step 9:- Repeat step 3 to 8 while selecting other part of the alphabet.


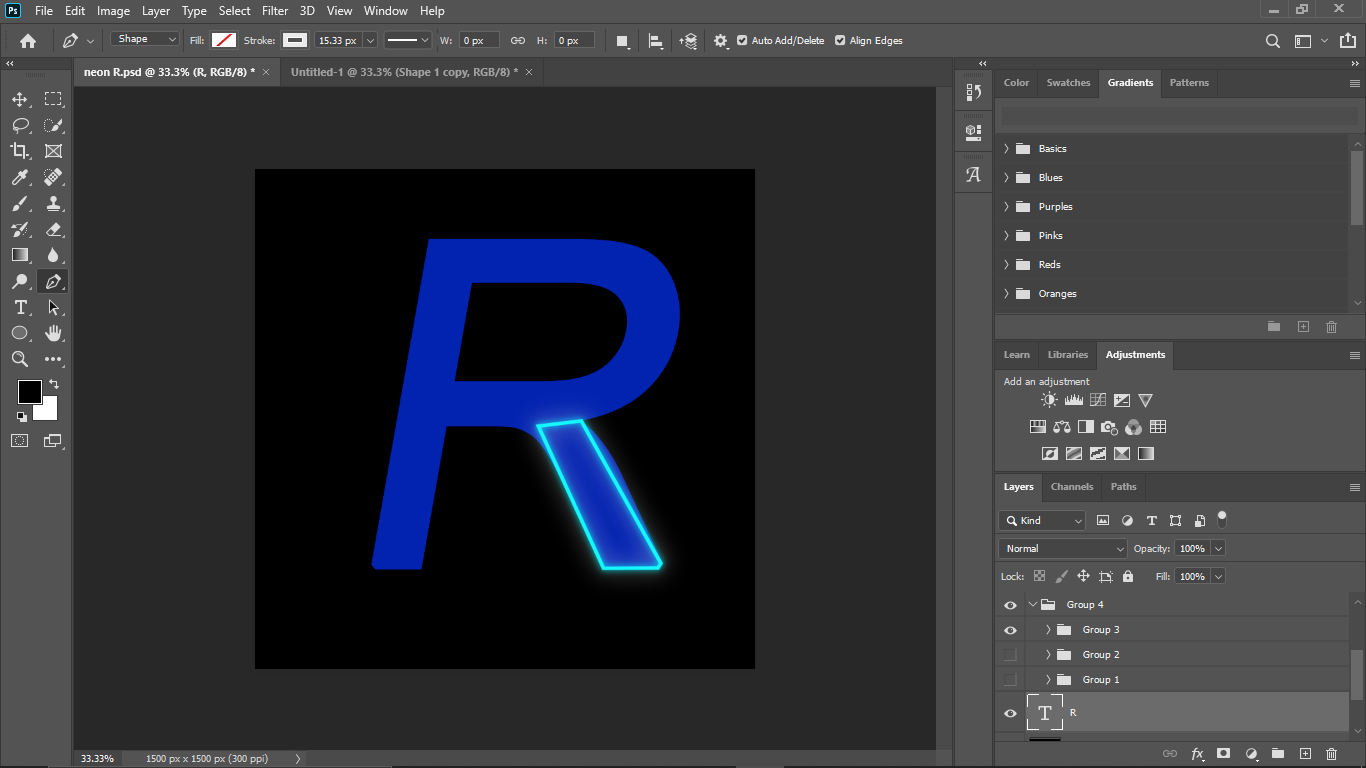
Step 10:- Now select one of these layer and use eraser tool to erase part of it so that it will lock like it is floating.
And will have a cool neon alphabel like this.

Comments
Post a Comment